
Introduction
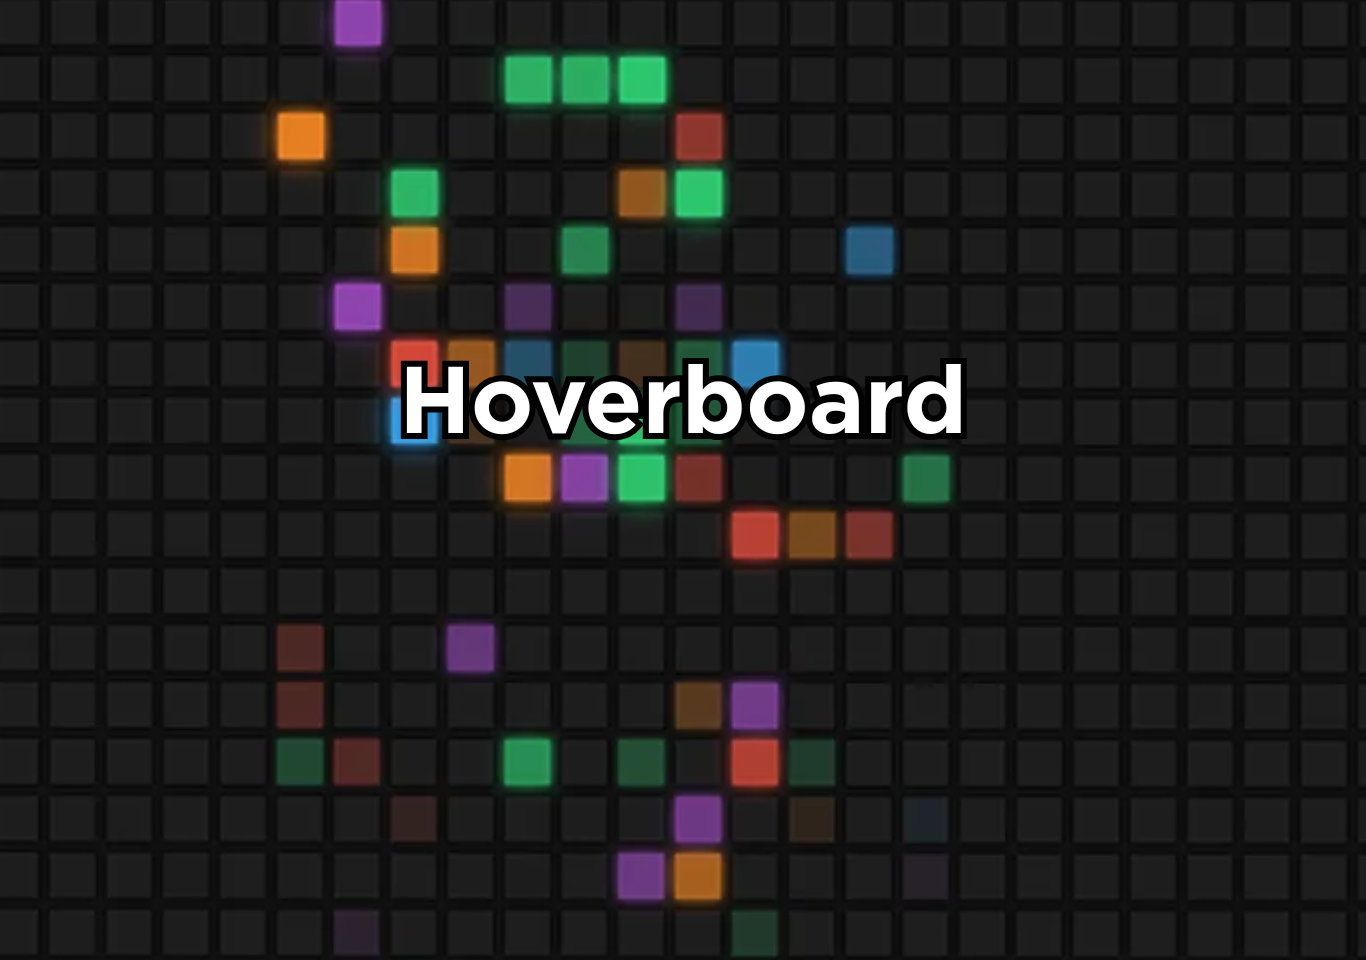
The hoverboard in JavaScript is a dynamic grid animation that reacts on user’s mouse movement. This guide explains everything behind the hoverboard effect without using a single line of code.
A hoverboard in JavaScript refers to a visual interactive grid made up of many small squares that react when the user moves the mouse over them. When the cursor touches each square, the color changes usually to a randomly selected shade or a predefined theme and then fades back to the original state when the cursor moves away. This creates a dynamic light effect across the board, which resembles a digital hover trail.
This project is popular because it teaches essential JavaScript fundamentals in a highly visual way. Beginners learn how to generate multiple elements dynamically, manipulate the DOM, attach event listeners, and apply style changes through JavaScript instead of static CSS. It also reinforces concepts like transitions, responsive layouts, and efficient rendering.
The hoverboard effect demonstrates how JavaScript can turn simple elements into an engaging, interactive UI experience. While often used as a beginner project, the underlying logic appears in real-world interactive designs, animations, and creative portfolios. Developers frequently expand it with features like color themes, glow effects, grid resizing, and animated trails, making it a powerful exercise for improving front-end logic and creativity.

Why hoverboard project?
- Instant visual feedback. You see results the moment you move your cursor.
- DOM creation, event listeners, loops, and dynamic styling all appear in a single project.
- Fully customizable. Color schemes, grid sizes, animations, glow effects everything can be extended.
- It looks better than the typical “calculator” or “to-do app”.
- The techniques behind the hoverboard effect appear in modern UI interactions, landing pages, and interactive art effects that support real world cases.
Step-by-step breakdown
Grid Creation
First, the script dynamically generates a grid container and populates it with a fixed number of boxes (usually div elements). This teaches DOM manipulation, letting you create elements programmatically rather than hardcoding HTML.
Styling the Grid
Each grid cell starts with base styling: a uniform size, default background color, and no glow or animation. This baseline ensures that hover effects will have a visible contrast when applied.
Attaching Hover Events
JavaScript adds mouse-center and mouse-leave (or mouse-over/mouse-out) event listeners to each box. These detect when the user hovers over or leaves a cell.
Color Change on Hover
When the mouse enters a cell, the listener triggers logic to change its background color or apply glow styling. This gives instant visual feedback based on pointer interaction.
Reset After Hover
On mouse-leave, the cell’s style is reset to its original state (color, shadow, etc.). This reset restores the “board” to its neutral look, creating the hovering trail effect.
Performance Considerations
To avoid slowdowns, the project uses efficient event handling (not too many listeners), minimal reflows, and optimized styling logic. Beginners often make mistakes here.
Advance enhancements
- Multiple color themes.
- Add controls that change the number of squares dynamically.
- Squares that stay lit longer create a trailing effect.
- Shape variations like circles, hexagons, or triangles change the entire aesthetic.
- Instead of strictly hover-based behavior, use momentum or velocity calculations to create dynamic light trails.
How to use this project?
- Download the project and extract the source code.
- Set up an editor or IDE.
- Open the project folder on the editor. (vs code, atom, sublime)
- Launch the program in the browser. (chrome, firefox)
- Hover your mouse over the board.
- Enjoy & Share
If you’re serious about improving your front-end skills, build the hoverboard project, expand it with custom themes, and apply the same principles to your other UI interactions.
Then explore related JavaScript projects on your website to continue strengthening your skills and growing your search visibility. Click the button below to get the full source code for this project and get experienced by yourself.
FAQs
1. What is the hoverboard effect in JavaScript?
It’s an interactive grid animation where squares change color when the user hovers over them.
2. Is the hoverboard project good for beginners?
Yes. It teaches DOM manipulation, styling logic, and event handling in an easy-to-understand format.
3. Can I use the hoverboard effect on real websites?
Yes, but it must be optimized. Overuse or oversized grids can degrade performance.
4. Does the hoverboard animation slow down devices?
It can if poorly optimized. Efficient event handling and proper grid sizing prevent performance issues.
5. How long does it take to build a hoverboard project?
Most beginners complete the base version within an hour.
6. Can the hoverboard project be customized?
Yes. Themes, animations, sizes, and behaviors are all changeable.