

Introduction
Call app is an android based project. It is useful for making phone calls from one device to another. The app is easy to use and implement.
In this tutorial, we will learn to make a phone call in android. We will be using Java programming language. It is a useful program useful in game and app development. This app is very easy and simple. It is useful for calling from one device to another. Just enter the number and click the button. You will make a call. You need to follow the instructions. The source code will be provided along with this tutorial. This app is a good practice for android.
Requirements
- Android Studio IDE.
- Java knowledge
We need to make a new project call app. After that we must provide android permission. Add this code insode android manifest.xml file.
AndroidManifest.xml
<uses-permission android:name="android.permission.CALL_PHONE" />
Let’s design our interface. You need to add linear layout, Edit Text and imageButton. The number is entered in text field and button is pressed for dialling. When the button is pressed a phone call event will occur. The receiver device will receive your phone call. See the code of user interface below..
activity_main.xml
<?xml version="1.0" encoding="utf-8"?>
<androidx.constraintlayout.widget.ConstraintLayout xmlns:android="http://schemas.android.com/apk/res/android"
    xmlns:app="http://schemas.android.com/apk/res-auto"
    xmlns:tools="http://schemas.android.com/tools"
    android:layout_width="match_parent"
    android:layout_height="match_parent"
    tools:context=".MainActivity">


    <EditText
        android:id="@+id/editTextPhone"
        android:layout_width="256dp"
        android:layout_height="59dp"
        android:layout_marginTop="80dp"
        android:backgroundTint="#121111"
        android:ems="10"
        android:hint="@string/app_hint"
        android:inputType="phone"
        android:textColor="#121111"
        app:layout_constraintEnd_toEndOf="parent"
        app:layout_constraintHorizontal_bias="0.429"
        app:layout_constraintStart_toStartOf="parent"
        app:layout_constraintTop_toTopOf="parent"
        android:autofillHints="" />

    <ImageButton
        android:id="@+id/imageButton"
        android:layout_width="138dp"
        android:layout_height="61dp"
        android:background="@color/colorAccent"
        android:backgroundTint="@color/colorAccent"
        android:tint="#040303"
        app:layout_constraintBottom_toBottomOf="parent"
        app:layout_constraintEnd_toEndOf="parent"
        app:layout_constraintHorizontal_bias="0.457"
        app:layout_constraintStart_toStartOf="parent"
        app:layout_constraintTop_toBottomOf="@+id/editTextPhone"
        app:layout_constraintVertical_bias="0.072"
        android:contentDescription="@string/app_desc"
        app:srcCompat="@android:drawable/ic_menu_call" />


</androidx.constraintlayout.widget.ConstraintLayout>
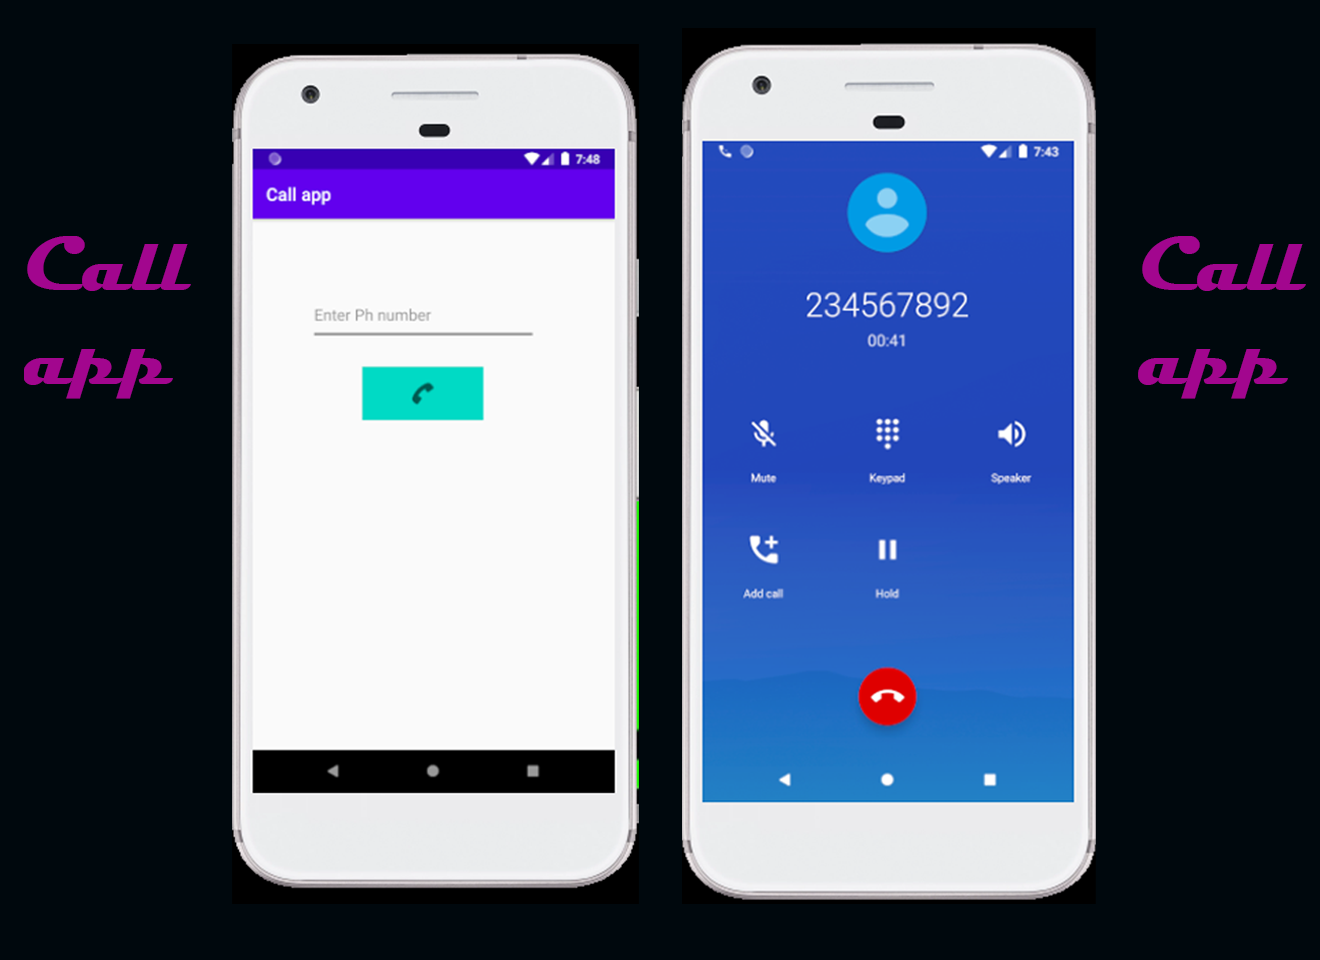
Design of Call app
The below image is the user interface design part of the call app.

Now we have to write the code in our main activity.java file. See the code below for main activity.
mainactivity.java
package com.example.callapp;

import androidx.appcompat.app.AppCompatActivity;
import androidx.core.app.ActivityCompat;
import androidx.core.content.ContextCompat;

import android.Manifest;
import android.content.Intent;
import android.content.pm.PackageManager;
import android.net.Uri;
import android.os.Bundle;
import android.view.Menu;
import android.view.View;
import android.widget.EditText;
import android.widget.ImageButton;
import android.widget.Toast;

public class MainActivity extends AppCompatActivity {
      EditText editTextPhone;
      ImageButton imageButton;

    @Override
    protected void onCreate(Bundle savedInstanceState) {
        super.onCreate(savedInstanceState);
        setContentView(R.layout.activity_main);

        editTextPhone = findViewById(R.id.editTextPhone);
        imageButton = findViewById(R.id.imageButton);

       imageButton.setOnClickListener(new View.OnClickListener() {
           @Override
           public void onClick(View v) {
               String number = editTextPhone.getText().toString();
               if (number.trim().length() > 0) {
                   if (ContextCompat.checkSelfPermission(MainActivity.this,
                           Manifest.permission.CALL_PHONE) != PackageManager.PERMISSION_GRANTED) {
                       ActivityCompat.requestPermissions(MainActivity.this,
                               new String[]{Manifest.permission.CALL_PHONE}, 1);
                   } else {
                       String dial = "tel:" + number;
                       startActivity(new Intent(Intent.ACTION_CALL, Uri.parse(dial)));
                   }
               } else {
                   Toast.makeText(MainActivity.this, "Enter Phone Number", Toast.LENGTH_SHORT).show();
               }
           }
       });
    }
}
Save and execute the project on the emulator. See the output below.

