Introduction
Todo apps remain one of the most widely used application types in the world. Creating a Todo app is one of the best project ideas for anyone learning Android development.
A todo app in Android is a simple productivity application that helps users manage daily tasks, reminders, and personal goals. It allows users to create a list of tasks, edit them, mark them as completed, and delete them when no longer needed. The main purpose of a todo app is to keep work organized and ensure important activities are remembered and completed on time. This app is written in Java programming language.
In Android, a todo app is usually built using components like Activities for screens, RecyclerView for displaying lists, and a database such as SQLite or Room to store tasks permanently. Users interact with the interface by adding new tasks through input fields, tapping checkboxes to update task status, and using buttons or swipe gestures to manage their list. A well-designed todo app focuses on a clean layout, a smooth user experience, and fast performance.
What does this app actually do?
- Add new tasks
- Edit or update tasks
- Mark tasks as completed
- Delete tasks
- Store tasks in a SQLite database
- Display tasks in an organized list

Why build a todo Android app?
Strong foundation
Java has been the core Android language for years. Understanding activity classes, layouts, and data storage in Java makes it easier to transition to more advanced frameworks later.
High demand in legacy projects
Many companies still maintain Java-based Android apps. Learning it increases your job and freelance opportunities.
Beginner-friendly structure
Java’s structure forces you to understand the fundamentals clearly rather than relying on shortcuts. Also, it is very easy to design using an IDE.
Community support
Java-based solutions, libraries, and tutorials are widely available, and a huge community makes problem-solving easier.
Application structure
- A screen showing the list of tasks
- A button to add a new task
- A dialog or new screen to enter task details
- Icons to mark completion or delete tasks
- SQLite Database for full control and long-term storage
Designing the user interface
The most important part of any Android application is the user interface that helps in user engagement.
Main screen
- Toolbar with the app name
- RecyclerView to display the list of tasks
- Floating Action Button (FAB) for adding tasks
- Subtle dividers or spacing to keep the list visually clean
Add task screen
- A text input field
- A save button
- A cancel or dismiss option
Item layout
- A checkbox
- The task text
- A delete button or swipe-to-delete
Building the project
A Todo app is designed to run smoothly without errors and provides a simple, useful way to manage daily tasks. It is easy to use, beginner-friendly, and can be built using Android Studio, which is the primary IDE for developing native Android applications.
This project uses Android Room as its database solution. Room works as an abstraction over SQLite, making data storage easier and more reliable. It supports offline access, and any changes can sync automatically once the device reconnects to the internet. To use Room, you need to update the necessary Gradle dependencies in your project.
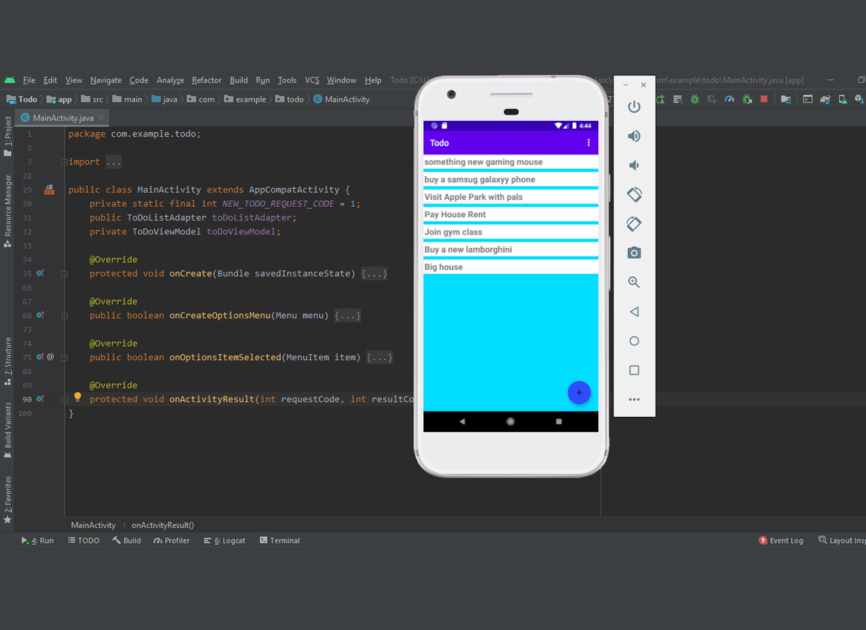
The app uses a RecyclerView to display all added tasks in an organized list. To add a new task, tap the add icon on the main screen. This opens a new layout where you can enter your task details. After pressing the save button, the task is stored in the database and instantly displayed in the list.
You can add unlimited tasks, and the app has a clean design with a colored background and a white task list for better readability. It is also easy to customize or modify the app according to your needs.
How to use this project?
- Download the project and extract the source code.
- Open Android Studio IDE.
- Set up the project.
- Select an Android emulator.
- Execute the project code.
- Add your first task.
- Enjoy!
Start building your Android To-Do app now and take your productivity skills to the next level. Open Android Studio, follow the steps, and create your own task manager. Click the button below to get the source code for this project👇.


Your writing has a way of resonating with me on a deep level. It’s clear that you put a lot of thought and effort into each piece, and it certainly doesn’t go unnoticed.
You’ve explained this better than anyone else I’ve read.